Tento návod je chráněn autorskými právy (c) 2012 od Falko Timme. Je odvozen z tutoriálu od Christopha Haase, který můžete najít na http://workaround.org. Tento výukový program můžete volně používat pod licencí Creative Commons 2.5 nebo jakoukoli novější verzí.
Tento dokument popisuje, jak nainstalovat poštovní server Postfix, který je založen na virtuálních uživatelích a doménách, tj. uživatelích a doménách, které jsou v databázi MySQL. Také předvedu instalaci a konfiguraci Courier (Courier-POP3, Courier-IMAP), aby se Courier mohl autentizovat proti stejné databázi MySQL, kterou používá Postfix.
Výsledný server Postfix je schopen SMTP-AUTH a TLS a kvóta (kvóta není standardně zabudována do Postfixu, ukážu, jak váš Postfix vhodně opravit). Hesla jsou uložena šifrovaně formulář v databázi (většina dokumentů, které jsem našel, se zabývala hesly v prostém textu, což je bezpečnostní riziko). Kromě toho tento tutoriál popisuje instalaci Amavisd , SpamAssassin a ClamAV takže e-maily budou kontrolovány na spam a viry. Také ukážu, jak nainstalovat SquirrelMail jako rozhraní webové pošty, aby uživatelé mohli číst a odesílat e-maily a měnit svá hesla.
Výhodou takového „virtuálního“ nastavení (virtuální uživatelé a domény v databázi MySQL) je, že je mnohem výkonnější než nastavení založené na „skutečných“ uživatelích systému. S tímto virtuálním nastavením může váš poštovní server obsluhovat tisíce domén a uživatelů. Kromě toho je snazší administrovat, protože s databází MySQL se musíte zabývat pouze tehdy, když přidáváte nové uživatele/domény nebo upravujete stávající. Žádné další postmapové příkazy pro vytváření db souborů, žádné další načítání Postfixu atd. Pro správu databáze MySQL můžete použít webové nástroje jako phpMyAdmin, který bude také nainstalován v tomto návodu. Třetí výhodou je, že uživatelé mají jako uživatelské jméno e-mailovou adresu (namísto uživatelského jména + e-mailové adresy), což je snazší pochopit a zapamatovat si.
Tento návod je myšlen jako praktický průvodce; nepokrývá teoretická východiska. Jsou zpracovány v mnoha dalších dokumentech na webu.
Tento dokument je dodáván bez jakékoli záruky! Chci říci, že to není jediný způsob, jak takový systém nastavit. Existuje mnoho způsobů, jak tohoto cíle dosáhnout, ale já volím tento způsob. Neposkytuji žádnou záruku, že to pro vás bude fungovat!
1 předběžná poznámka
Tento výukový program je založen na serveru Ubuntu 12.10 (Quantal Quetzal), takže před pokračováním v tomto výukovém programu byste měli nastavit základní instalaci serveru Ubuntu 12.10. Systém by měl mít statickou IP adresu. V tomto návodu používám jako svou IP adresu 192.168.0.100 a jako název hostitele server1.example.com.
Ujistěte se, že jste přihlášeni jako root (zadejte
sudo su
stát se rootem), protože všechny kroky z tohoto tutoriálu musíme spustit jako uživatel root.
Je velmi důležité, abyste z /bin/sh udělali symbolický odkaz na /bin/bash...
dpkg-reconfigure dash
Použít pomlčku jako výchozí systémové prostředí (/bin/sh)? <-- Ne
... a že deaktivujete AppArmor:
/etc/init.d/apparmor stop
update-rc.d -f apparmor remove
apt-get remove apparmor apparmor-utils
2 Instalace Postfix, Courier, Saslauthd, MySQL, phpMyAdmin
Chcete-li nainstalovat Postfix, Courier, Saslauthd, MySQL a phpMyAdmin, jednoduše spustíme
apt-get install postfix postfix-mysql postfix-doc mysql-client mysql-server courier-authdaemon courier-authlib-mysql courier-pop courier-pop-ssl courier-imap courier-imap-ssl libsasl2-2 libsasl2-modules libsasl2-modules-sql sasl2-bin libpam-mysql openssl phpmyadmin apache2 libapache2-mod-php5 php5 php5-mysql libpam-smbpass
Budete požádáni o několik otázek:
Nové heslo pro uživatele "root" MySQL:<-- yourrootsqlpassword
Opakujte heslo pro uživatele "root" MySQL:<-- yourrootsqlpassword
Vytvořit adresáře pro webovou administraci? <-- Ne
Obecný typ konfigurace pošty:<-- Internetový server
Název systémové pošty:<-- server1.example.com
Vyžadován certifikát SSL <-- OK
Webový server se překonfiguruje automaticky:<-- apache2
Nakonfigurujte databázi pro phpmyadmin pomocí dbconfig-common? <-- Ne
3 Použití opravy kvót na Postfix
Musíme získat zdrojové kódy Postfixu, opravit jej pomocí opravy kvót, vytvořit nové balíčky Postfix .deb a nainstalovat tyto balíčky .deb:
apt-get build-dep postfix
cd /usr/src
apt-get source postfix
(Ujistěte se, že v následujících příkazech používáte správnou verzi Postfixu. Mám nainstalovaný Postfix 2.9.3. Verzi Postfixu můžete zjistit spuštěním
postconf -d | grep mail_version
Výstup by měl vypadat takto:
[e-mail chráněný]:/usr/src# postconf -d | grep mail_version
mail_version =2.9.3
milter_macro_v =$mail_name $mail_version
[e-mail chráněný]:/usr/src#
)
wget http://vda.sourceforge.net/VDA/postfix-vda-v11-2.9.1.patch
cd postfix-2.9.3
patch -p1 <../postfix-vda-v11 -2.9.1.patch
Dále otevřete debian/rules a změňte DEB_BUILD_HARDENING z 1 na 0:
vi debian/rules
[...] export DEB_BUILD_HARDENING=0 [...] |
Pokud to neuděláte, vaše sestavení se nezdaří s následujícími chybovými zprávami:
maildir.c:Ve funkci âdeliver_maildirâ:
maildir.c:974:17:chyba:formát není řetězcový doslovný a žádné argumenty formátu [-Werror=format-security]
maildir.c:977:17 :error:formát není řetězcový literál a žádné argumenty formátu [-Werror=format-security]
maildir.c:983:17:error:formát není řetězcový literál a žádné argumenty formátu [-Werror=format-security ]
maildir.c:986:17:chyba:formát není řetězcový literál a žádné argumenty formátu [-Werror=format-security]
maildir.c:Ve funkci âsql2fileâ:
maildir. c:404:25:varování:ignorování návratové hodnoty âreadâ, deklarované pomocí atributu warning_unused_result [-Wunused-result]
maildir.c:417:26:varování:ignorování návratové hodnoty âwriteâ, deklarované s atributem warning_unused_result [- Wunused-result]
cc1:některá varování jsou považována za chyby
make:*** [maildir.o] Chyba 1
make:Opuštění adresáře `/usr/src/postfix-2.9. 3/src/virtual'
make[1]:*** [aktualizace] Chyba 1
make[1]:Opuštění adresáře `/usr/src/postfix -2.9.3'
make:*** [build] Error 2
dpkg-buildpackage:error:debian/rules build poskytlo chybu stav ukončení 2
[email protected]:/usr/ src/postfix-2.9.3#
Nyní můžeme sestavit nové balíčky .deb Postfixu:
dpkg-buildpackage
Nyní přejdeme o jeden adresář výše, tam byly vytvořeny nové balíčky .deb:
cd ..
Příkaz
ls -l
zobrazí dostupné balíčky:
[e-mail chráněný]:/usr/src# ls -l
celkem 6928
drwxr-xr-x 24 kořenový kořen 4096 19. října 12:56 linux-headers-3.5.0-17
drwxr-xr-x 7 kořenový kořen 4096 19. října 12:56 linux-headers-3.5.0-17-generic
drwxr-xr-x 18 kořenový kořen 4096 <1 14.-29. listopadu. 14. listopadu:/>-rw-r--r-- 1 kořenový kořen 3809 Nov 4 14:11 postfix_2.9.3-2ubuntu2_amd64.changes
-rw-r--r-- 1 kořenový kořen 1510254 Nov 211 Nov 1510254 Nov .9.3-2ubuntu2_amd64.deb
-rw-r--r-- 1 kořenový kořen 249645 4. listopadu 14:10 postfix_2.9.3-2ubuntu2.diff.gz
-rw-r--r-- 1 kořen 1599 Nov 4 14:10 postfix_2.9.3-2ubuntu2.dsc
-rw-r--r-- 1 kořen 3760555 30. května 18:04 /3 br.zrig.9>-rw-r--r-- 1 kořenový kořen 47064 Nov 4 14:11 postfix-cdb_2.9.3-2ubuntu2_amd64.deb
-rw-r--r-- 1 4:kořen N15914 N15913 postfix-dev_2.9.3-2ubuntu2_all.deb
-rw-r--r-- 1 kořen 1077006 Nov 4 14:11 postfix-doc_2.9.3-2ubuntu2_all.deb
-rw-r- r-- 1 kořenový kořen 55430 4. listopadu 14:11 postfix-ldap_2.9.3-2u buntu2_amd64.deb
-rw-r--r-- 1 kořenový kořen 48796 Nov 4 14:11 postfix-mysql_2.9.3-2ubuntu2_amd64.deb
-rw-r--r-- 48964 4. listopadu 14:11 postfix-pcre_2.9.3-2ubuntu2_amd64.deb
-rw-r--r-- 1 kořenový kořen 48978 4. listopadu 14:11 postfix-pgsql.b.2 postfix-pgsql. -rw-r--r-- 1 kořenový kořen 55009 11. dubna 2012 postfix-vda-v11-2.9.1.patch
[e-mail chráněný]:/usr/src#
Vyberte balíčky postfix a postfix-mysql a nainstalujte je takto:
dpkg -i postfix_2.9.3-2ubuntu2_amd64.deb postfix-mysql_2.9.3-2ubuntu2_amd64.deb
4 Vytvoření databáze MySQL pro Postfix/Courier
Nyní vytvoříme databázi s názvem mail:
mysqladmin -u root -p create mail
Dále přejdeme do prostředí MySQL:
mysql -u root -p
V prostředí MySQL vytvoříme uživatele mail_admin s heslem mail_admin_password (nahraďte ho vlastním heslem), který má oprávnění SELECT, INSERT, UPDATE, DELETE v poštovní databázi. Tento uživatel bude používán Postfixem a Courierem pro připojení k poštovní databázi:
GRANT SELECT, INSERT, UPDATE, DELETE ON mail.* TO 'mail_admin'@'localhost' IDENTIFIED BY 'mail_admin_password';
GRANT SELECT, INSERT, UPDATE, DELETE ON mail.* TO 'mail_admin'@'localhost. localdomain' IDENTIFIED BY 'mail_admin_password';
FLUSH PRIVILEGES;
Stále v prostředí MySQL vytváříme tabulky potřebné pro Postfix a Courier:
USE mail;
CREATE TABLE domény (
doména varchar(50) NOT NULL,
PRIMÁRNÍ KLÍČ (doména) )
ENGINE=MyISAM;
CREATE TABLE přesměrování (
zdroj varchar(80) NOT NULL,
cílový TEXT NENÍ NULL,
PRIMÁRNÍ KLÍČ (zdroj) )
ENGINE=MyISAM;
CREATE TABLE uživatelé (
e-mail varchar(80) NOT NULL,
heslo varchar(20) NOT NULL,
kvóta INT(10) DEFAULT '10485760',
PRIMÁRNÍ KLÍČ (e-mail )
) ENGINE=MyISAM;
CREATE TABLE transport (
doména varchar(128) NOT NULL výchozí '',
transport varchar(128) NOT NULL výchozí '',
UNIQUE KEY doména (doména)
) ENGINE =MyISAM;
quit;
Jak jste si možná všimli, s ukončením; příkaz opustili jsme prostředí MySQL a jsme zpět v prostředí Linux.
domény tabulka bude ukládat každou virtuální doménu, pro kterou by měl Postfix přijímat e-maily (např. example.com ).
| doména |
| example.com |
přeposílání tabulka je pro alias jedné e-mailové adresy na jinou, např. přeposílat e-maily pro [e-mail chráněný] na [e-mail chráněný] .
| zdroj | cíl |
| [e-mail chráněn] | [e-mail chráněn] |
uživatelé tabulka ukládá všechny virtuální uživatele (tj. e-mailové adresy, protože e-mailová adresa a uživatelské jméno jsou stejné) a hesla (v šifrovaném formulář!) a hodnotu kvóty pro každou poštovní schránku (v tomto příkladu je výchozí hodnota 10485760 bajtů, což znamená 10 MB).
| heslo | kvóta | |
| [e-mail chráněn] | No9.E4skNvGa. („tajné“ v zašifrované podobě) | 10485760 |
doprava tabulka je volitelná, je pro pokročilé uživatele. Umožňuje přeposílat maily pro jednotlivé uživatele, celé domény nebo všechny maily na jiný server. Například
| doména | doprava |
| example.com | smtp:[1.2.3.4] |
přeposílá všechny e-maily pro example.com přes protokol smtp na server s IP adresou 1.2.3.4 (hranaté závorky [] znamená "neprovádět vyhledávání MX DNS záznamu" (což má smysl pro IP adresy...). Pokud místo toho použijete plně kvalifikovaný název domény (FQDN), nepoužívejte hranaté závorky.).
BTW, (předpokládám, že IP adresa vašeho systému poštovního serveru je 192.168.0.100) můžete přistupovat k phpMyAdmin přes http://192.168.0.100/phpmyadmin/ v prohlížeči a přihlásit se jako mail_admin. Pak se můžete podívat do databáze. Později můžete použít phpMyAdmin ke správě vašeho poštovního serveru.
5 Konfigurace Postfixu
Nyní musíme Postfixu sdělit, kde najde všechny informace v databázi. Proto musíme vytvořit šest textových souborů. Všimnete si, že říkám Postfixu, aby se připojil k MySQL na IP adrese 127.0.0.1 namísto localhost. Je to proto, že Postfix běží v chroot jail a nemá přístup k MySQL socketu, ke kterému by se pokusil připojit, kdybych Postfixu řekl, aby používal localhost. Pokud použiji 127.0.0.1 Postfix používá TCP networking pro připojení k MySQL, což není problém ani v chroot jail (alternativou by bylo přesunout MySQL socket do chroot jail, což způsobuje některé další problémy).
Ujistěte se prosím, že /etc/mysql/my.cnf obsahuje následující řádek:
vi /etc/mysql/my.cnf
[...] # Instead of skip-networking the default is now to listen only on # localhost which is more compatible and is not less secure. bind-address = 127.0.0.1 [...] |
Pokud jste museli upravit /etc/mysql/my.cnf, restartujte prosím MySQL nyní:
/etc/init.d/mysql restart
Spustit
netstat -tap | grep mysql
abyste se ujistili, že MySQL naslouchá na 127.0.0.1 (localhost.localdomain):
[e-mail chráněný]:/usr/src# netstat -tap | grep mysql
tcp 0 0 localhost.localdo:mysql *:* POSLECHNOUT 3895/mysqld
:/chráněno e-mailem
Nyní vytvoříme našich šest textových souborů.
vi /etc/postfix/mysql-virtual_domains.cf
user = mail_admin password = mail_admin_password dbname = mail query = SELECT domain AS virtual FROM domains WHERE domain='%s' hosts = 127.0.0.1 |
vi /etc/postfix/mysql-virtual_forwardings.cf
user = mail_admin password = mail_admin_password dbname = mail query = SELECT destination FROM forwardings WHERE source='%s' hosts = 127.0.0.1 |
vi /etc/postfix/mysql-virtual_mailboxes.cf
user = mail_admin password = mail_admin_password dbname = mail query = SELECT CONCAT(SUBSTRING_INDEX(email,'@',-1),'/',SUBSTRING_INDEX(email,'@',1),'/') FROM users WHERE email='%s' hosts = 127.0.0.1 |
vi /etc/postfix/mysql-virtual_email2email.cf
user = mail_admin password = mail_admin_password dbname = mail query = SELECT email FROM users WHERE email='%s' hosts = 127.0.0.1 |
vi /etc/postfix/mysql-virtual_transports.cf
user = mail_admin password = mail_admin_password dbname = mail query = SELECT transport FROM transport WHERE domain='%s' hosts = 127.0.0.1 |
vi /etc/postfix/mysql-virtual_mailbox_limit_maps.cf
user = mail_admin password = mail_admin_password dbname = mail query = SELECT quota FROM users WHERE email='%s' hosts = 127.0.0.1 |
Poté změňte oprávnění a skupinu těchto souborů:
chmod o=/etc/postfix/mysql-virtual_*.cf
chgrp postfix /etc/postfix/mysql-virtual_*.cf
Nyní vytvoříme uživatele a skupinu s názvem vmail s domovským adresářem /home/vmail. Zde budou uloženy všechny poštovní schránky.
groupadd -g 5000 vmail
useradd -g vmail -u 5000 vmail -d /home/vmail -m
Dále provedeme konfiguraci Postfixu. Ujistěte se, že jste nahradili server1.example.com platným FQDN, jinak váš Postfix nemusí fungovat správně!
postconf -e 'myhostname =server1.example.com'
postconf -e 'mydestination =server1.example.com, localhost, localhost.localdomain'
postconf -e 'mynetworks =127.0.0.0/8'
postconf -e 'virtual_alias_domains ='
postconf -e 'virtual_alias_maps =proxy:mysql:/etc/postfix/mysql-virtual_forwardings.cf, mysql:/etc/postfix
postconf -e 'virtual_mailbox_maps =proxy:mysql:/etc/postfix/mysql-virtual_mail' br />postconf -e 'virtual_mailbox_base =/home/vmail'
postconf -e 'virtual_uid_maps =static:5000'
postconf -e 'virtual_gid_maps =static:5000'
postconf -e ' smtpd_sasl_auth_enable =yes'
postconf -e 'broken_sasl_auth_clients =yes'
postconf -e 'smtpd_sasl_authenticated_header =yes'
postconf -e 'smtpd_recipient_net_smtpd_recipient_smtpd_recipient_smtpd_recipient_smtpd_recipient -e 'smtpd_use_tls =yes'
postconf -e 'smtpd_tls_cert_file =/etc/postfix/smtpd.cert'
postconf -e 'smtpd_tls_key_file =/etc/postfix'/smtpd> -e 'transport_maps =proxy:mysql:/etc/postfix/mysql-virtual_transports.cf'
postconf -e 'virtual_maildir_extended =yes'
postconf -e 'virtual_mailbox_limit_maps =proxy:myc/postfix:/et /mysql-virtual_mailbox_limit_maps.cf'
postconf -e 'virtual_mailbox_limit_override =yes'
postconf -e 'virtual_maildir_limit_message ="Uživatel, kterého se pokoušíte oslovit, překročil kvótu."'
postconf -e 'virtual_overquota_bounce =yes'
postconf -e 'proxy_read_maps =$ místní_příjemce_mapy $ mydestination $ virtual_alias_maps $ virtual_alias_domains $ virtual_mailbox_maps $ virtual_mailbox_domains $ relay_recipient_maps $ relay_domains $ canonical_maps $ sender_canonical_maps $ recipient_canonical_maps $ relocated_maps $ transport_maps $ mynetworks $ virtual_mailbox_limit_maps'
Poté vytvoříme SSL certifikát, který je potřeba pro TLS:
cd /etc/postfix
openssl req -new -outform PEM -out smtpd.cert -newkey rsa:2048 -nodes -keyout smtpd.key -keyform PEM -days 365 -x509
Název země (2 písmenný kód) [AU]:<-- Zadejte název země (např. „DE“).
Název státu nebo provincie (celý název) [Některý stát]:<-- Zadejte svůj stát nebo název provincie.
Název lokality (např. město) []:<-- Zadejte své město.
Název organizace (např. společnost) [Internet Widgits Pty Ltd]:<-- Zadejte název organizace (např. název vaší společnosti).
Název organizační jednotky (např. sekce) []:<-- Zadejte název organizační jednotky (např. „IT oddělení“).
Běžný název (např. VAŠE jméno) []:<-- Zadejte plně kvalifikovaný název domény systému (např. "server1.example.com").
E-mailová adresa []:<-- Zadejte svou e-mailovou adresu.
Poté změňte oprávnění souboru smtpd.key:
chmod o= /etc/postfix/smtpd.key
6 Konfigurace Saslauthd
První spuštění
mkdir -p /var/spool/postfix/var/run/saslauthd
Poté upravte /etc/default/saslauthd. Nastavte START na yes a změňte řádek OPTIONS="-c -m /var/run/saslauthd" na OPTIONS="-c -m /var/spool/postfix/var/run/saslauthd -r":
vi /etc/default/saslauthd
# # Settings for saslauthd daemon # Please read /usr/share/doc/sasl2-bin/README.Debian for details. # # Should saslauthd run automatically on startup? (default: no) START=yes # Description of this saslauthd instance. Recommended. # (suggestion: SASL Authentication Daemon) DESC="SASL Authentication Daemon" # Short name of this saslauthd instance. Strongly recommended. # (suggestion: saslauthd) NAME="saslauthd" # Which authentication mechanisms should saslauthd use? (default: pam) # # Available options in this Debian package: # getpwent -- use the getpwent() library function # kerberos5 -- use Kerberos 5 # pam -- use PAM # rimap -- use a remote IMAP server # shadow -- use the local shadow password file # sasldb -- use the local sasldb database file # ldap -- use LDAP (configuration is in /etc/saslauthd.conf) # # Only one option may be used at a time. See the saslauthd man page # for more information. # # Example: MECHANISMS="pam" MECHANISMS="pam" # Additional options for this mechanism. (default: none) # See the saslauthd man page for information about mech-specific options. MECH_OPTIONS="" # How many saslauthd processes should we run? (default: 5) # A value of 0 will fork a new process for each connection. THREADS=5 # Other options (default: -c -m /var/run/saslauthd) # Note: You MUST specify the -m option or saslauthd won't run! # # WARNING: DO NOT SPECIFY THE -d OPTION. # The -d option will cause saslauthd to run in the foreground instead of as # a daemon. This will PREVENT YOUR SYSTEM FROM BOOTING PROPERLY. If you wish # to run saslauthd in debug mode, please run it by hand to be safe. # # See /usr/share/doc/sasl2-bin/README.Debian for Debian-specific information. # See the saslauthd man page and the output of 'saslauthd -h' for general # information about these options. # # Example for chroot Postfix users: "-c -m /var/spool/postfix/var/run/saslauthd" # Example for non-chroot Postfix users: "-c -m /var/run/saslauthd" # # To know if your Postfix is running chroot, check /etc/postfix/master.cf. # If it has the line "smtp inet n - y - - smtpd" or "smtp inet n - - - - smtpd" # then your Postfix is running in a chroot. # If it has the line "smtp inet n - n - - smtpd" then your Postfix is NOT # running in a chroot. #OPTIONS="-c -m /var/run/saslauthd" OPTIONS="-c -m /var/spool/postfix/var/run/saslauthd -r" |
Poté vytvořte soubor /etc/pam.d/smtp. Měl by obsahovat pouze následující dva řádky (nezapomeňte vyplnit správné údaje o databázi):
vi /etc/pam.d/smtp
auth required pam_mysql.so user=mail_admin passwd=mail_admin_password host=127.0.0.1 db=mail table=users usercolumn=email passwdcolumn=password crypt=1 account sufficient pam_mysql.so user=mail_admin passwd=mail_admin_password host=127.0.0.1 db=mail table=users usercolumn=email passwdcolumn=password crypt=1 |
Dále vytvořte soubor /etc/postfix/sasl/smtpd.conf. Mělo by to vypadat takto:
vi /etc/postfix/sasl/smtpd.conf
pwcheck_method: saslauthd mech_list: plain login allow_plaintext: true auxprop_plugin: sql sql_engine: mysql sql_hostnames: 127.0.0.1 sql_user: mail_admin sql_passwd: mail_admin_password sql_database: mail sql_select: select password from users where email = '%[email protected]%r' |
Dále přidejte uživatele postfixu do skupiny sasl (tím zajistíte, že Postfix má oprávnění pro přístup k saslauthd):
adduser postfix sasl
Poté restartujte Postfix a Saslauthd:
/etc/init.d/postfix restart
/etc/init.d/saslauthd restart
7 Konfigurace kurýra
Nyní musíme Courierovi sdělit, že by se měl autentizovat proti naší databázi MySQL. Nejprve upravte /etc/courier/authdaemonrc a změňte hodnotu authmodulelist tak, aby zněla:
vi /etc/courier/authdaemonrc
[...] authmodulelist="authmysql" [...] |
Poté vytvořte zálohu /etc/courier/authmysqlrc a vyprázdněte starý soubor:
cp /etc/courier/authmysqlrc /etc/courier/authmysqlrc_orig
cat /dev/null> /etc/courier/authmysqlrc
Poté otevřete /etc/courier/authmysqlrc a vložte do něj následující řádky:
vi /etc/courier/authmysqlrc
MYSQL_SERVER localhost MYSQL_USERNAME mail_admin MYSQL_PASSWORD mail_admin_password MYSQL_PORT 0 MYSQL_DATABASE mail MYSQL_USER_TABLE users MYSQL_CRYPT_PWFIELD password #MYSQL_CLEAR_PWFIELD password MYSQL_UID_FIELD 5000 MYSQL_GID_FIELD 5000 MYSQL_LOGIN_FIELD email MYSQL_HOME_FIELD "/home/vmail" MYSQL_MAILDIR_FIELD CONCAT(SUBSTRING_INDEX(email,'@',-1),'/',SUBSTRING_INDEX(email,'@',1),'/') #MYSQL_NAME_FIELD MYSQL_QUOTA_FIELD quota |
Během instalace se vytvoří certifikáty SSL pro IMAP-SSL a POP3-SSL s názvem hostitele localhost. Chcete-li toto změnit na správný název hostitele (server1.example.com v tomto návodu), odstraňte certifikáty...
cd /etc/courier
rm -f /etc/courier/imapd.pem
rm -f /etc/courier/pop3d.pem
... a upravit následující dva soubory; nahraďte CN=localhost za CN=server1.example.com (v případě potřeby můžete upravit i ostatní hodnoty):
vi /etc/courier/imapd.cnf
[...] CN=server1.example.com [...] |
vi /etc/courier/pop3d.cnf
[...] CN=server1.example.com [...] |
Poté znovu vytvořte certifikáty...
mkimapdcert
mkpop3dcert
... a restartujte Courier:
/etc/init.d/courier-authdaemon restart
/etc/init.d/courier-imap restart
/etc/init.d/courier-imap-ssl restart
/etc/ init.d/courier-pop restart
/etc/init.d/courier-pop-ssl restart
Spuštěním
telnet localhost pop3
můžete zjistit, zda váš server POP3 funguje správně. Mělo by to vrátit +OK Dobrý den. (Napište quit pro návrat do prostředí Linuxu.)
[email protected]:/etc/courier# telnet localhost pop3
Zkouším 127.0.0.1...
Připojeno k localhost.localdomain.
Escape znak je '^]'.
+OK Dobrý den.
<-- ukončit
+OK Hodně štěstí příště.
Spojení uzavřeno zahraničním hostitelem.
[e-mail chráněn]:/etc/courier#
8 Upravit /etc/aliases
Nyní bychom měli otevřít /etc/aliases. Ujistěte se, že postmaster odkazuje na root a root na vaše vlastní uživatelské jméno nebo vaši e-mailovou adresu, např. takto:
vi /etc/aliases
[...] postmaster: root root: [email protected] [...] |
nebo takto (pokud je správcem vaše vlastní uživatelské jméno):
[...] postmaster: root root: administrator [...] |
Kdykoli upravíte /etc/aliases, musíte spustit
newaliases
poté a restartujte Postfix:
/etc/init.d/postfix restart
9 Nainstalovat amavisd-new, SpamAssassin a ClamAV
Chcete-li nainstalovat amavisd-new, spamassassin a clamav, spusťte následující příkaz:
apt-get install amavisd-new spamassassin clamav clamav-daemon zoo unzip bzip2 libnet-ph-perl libnet-snpp-perl libnet-telnet-perl nomarch lzop pax
Poté musíme nakonfigurovat amavisd-new. Konfigurace je rozdělena do různých souborů, které jsou umístěny v adresáři /etc/amavis/conf.d. Podívejte se na každý z nich, abyste se seznámili s konfigurací. Většina nastavení je v pořádku, musíme však upravit tři soubory:
Nejprve musíme povolit ClamAV a SpamAssassin v /etc/amavis/conf.d/15-content_filter_mode zrušením komentáře u řádků @bypass_virus_checks_maps a @bypass_spam_checks_maps:
vi /etc/amavis/conf.d/15-content_filter_mode
Soubor by měl vypadat takto:
use strict; # You can modify this file to re-enable SPAM checking through spamassassin # and to re-enable antivirus checking. # # Default antivirus checking mode # Please note, that anti-virus checking is DISABLED by # default. # If You wish to enable it, please uncomment the following lines: @bypass_virus_checks_maps = ( \%bypass_virus_checks, \@bypass_virus_checks_acl, \$bypass_virus_checks_re); # # Default SPAM checking mode # Please note, that anti-spam checking is DISABLED by # default. # If You wish to enable it, please uncomment the following lines: @bypass_spam_checks_maps = ( \%bypass_spam_checks, \@bypass_spam_checks_acl, \$bypass_spam_checks_re); 1; # ensure a defined return |
A pak byste se měli podívat na nastavení spamu a akce pro spam-/virus-maily v /etc/amavis/conf.d/20-debian_defaults. Pokud vám výchozí nastavení vyhovuje, není třeba nic měnit. Soubor obsahuje mnoho vysvětlení, takže zde není třeba vysvětlovat nastavení:
vi /etc/amavis/conf.d/20-debian_defaults
[...] $QUARANTINEDIR = "$MYHOME/virusmails"; $quarantine_subdir_levels = 1; # enable quarantine dir hashing $log_recip_templ = undef; # disable by-recipient level-0 log entries $DO_SYSLOG = 1; # log via syslogd (preferred) $syslog_ident = 'amavis'; # syslog ident tag, prepended to all messages $syslog_facility = 'mail'; $syslog_priority = 'debug'; # switch to info to drop debug output, etc $enable_db = 1; # enable use of BerkeleyDB/libdb (SNMP and nanny) $enable_global_cache = 1; # enable use of libdb-based cache if $enable_db=1 $inet_socket_port = 10024; # default listening socket $sa_spam_subject_tag = '***SPAM*** '; $sa_tag_level_deflt = 2.0; # add spam info headers if at, or above that level $sa_tag2_level_deflt = 6.31; # add 'spam detected' headers at that level $sa_kill_level_deflt = 6.31; # triggers spam evasive actions $sa_dsn_cutoff_level = 10; # spam level beyond which a DSN is not sent [...] $final_virus_destiny = D_DISCARD; # (data not lost, see virus quarantine) $final_banned_destiny = D_BOUNCE; # D_REJECT when front-end MTA $final_spam_destiny = D_BOUNCE; $final_bad_header_destiny = D_PASS; # False-positive prone (for spam) [...] |
Nakonec upravte /etc/amavis/conf.d/50-user a přidejte řádek $pax='pax'; uprostřed:
vi /etc/amavis/conf.d/50-user
use strict; # # Place your configuration directives here. They will override those in # earlier files. # # See /usr/share/doc/amavisd-new/ for documentation and examples of # the directives you can use in this file # $pax='pax'; #------------ Do not modify anything below this line ------------- 1; # ensure a defined return |
Poté spusťte tyto příkazy pro přidání uživatele clamav do skupiny amavis a pro restartování amavisd-new a ClamAV:
adduser clamav amavis
/etc/init.d/amavis restart
/etc/init.d/clamav-freshclam restart
/etc/init.d/clamav-daemon restart
Nyní musíme nakonfigurovat Postfix tak, aby zprostředkovával příchozí e-maily přes amavisd-new:
postconf -e 'content_filter =amavis:[127.0.0.1]:10024'
postconf -e 'receive_override_options =no_address_mappings'
Poté do /etc/postfix/master.cf připojte následující řádky:
vi /etc/postfix/master.cf
[...]
amavis unix - - - - 2 smtp
        -o smtp_data_done_timeout=1200
        -o smtp_send_xforward_command=yes

127.0.0.1:10025 inet n - - - - smtpd
        -o content_filter=
        -o local_recipient_maps=
        -o relay_recipient_maps=
        -o smtpd_restriction_classes=
        -o smtpd_client_restrictions=
        -o smtpd_helo_restrictions=
        -o smtpd_sender_restrictions=
        -o smtpd_recipient_restrictions=permit_mynetworks,reject
        -o mynetworks=127.0.0.0/8
        -o strict_rfc821_envelopes=yes
-o receive_override_options=no_unknown_recipient_checks,no_header_body_checks |
Poté restartujte Postfix:
/etc/init.d/postfix restart
Nyní spusťte
netstat -tap
a měli byste vidět Postfix (master) naslouchající na portu 25 (smtp) a 10025 a amavisd-new na portu 10024:
[e-mail protected]:/etc/courier# netstat -tap
Aktivní internetová připojení (servery a navázané)
Proto Recv-Q Send-Q Místní adresa Cizí adresa < D > Program Stát 0 0*:http*:*Poslouchejte 6134 /apache2
tcp 0 0*:ssh*:*poslouchejte 610 /sshd
tcp 0 0*:smtp*:*poslouchejte 23128 /master
TCP 0 0 localhost.localdo:10024*:*Poslouchejte 21937 /amavisd-new (
tcp 0 0 localhost.localdo:10025*:*poslouchejte 23128 /master
tcp 0 0 localhost.localdo:mysql** :*Poslouchejte 4308 /mysqld
tcp 0 52 server1.example.com:ssh 192.168.0.206:57597 Zavedeno 976/0
tcp6 0 0 [::]:ssh [::]:*Poslouchejte 610 /sshd
tcp6 0 0 [::]:SMTP [::]:*Poslouchejte 23128 /master
tcp6 0 0 [::]:imaps [::]:*Poslouchejte 18191 /coriertcpd
tcp6 0 0 [::]:pop3s [::]:*Poslouchejte 18259 /coriertcpd
tcp6 0 0 [::]:pop3 [::]:*Poslouchejte 18222 /coriertcpd
tcp6 0 0 [::]:imap2 [ ::]:* POSLOUCHEJTE 18154/couriertcpd
[e-mail chráněn]:/etc/courier#
10 Instalace Razor, Pyzor a DCC a konfigurace SpamAssassin
Razor, Pyzor a DCC jsou spamfiltry, které využívají síť kolaborativního filtrování. Chcete-li nainstalovat Razor a Pyzor, spusťte
apt-get install razor pyzor
DCC není k dispozici v repozitářích Ubuntu 12.10, takže jej nainstalujeme následovně:
cd /tmp
wget http://www.dcc-servers.net/dcc/source/dcc-dccproc.tar.Z
tar xzvf dcc-dccproc.tar.Z
cd dcc -dccproc-1.3.143
./configure --with-uid=amavis
vytvořit
provést instalaci
chown -R amavis:amavis /var/dcc
ln -s /var/dcc/libexec/dccifd /usr/local/bin/dccifd
Nyní musíme říci SpamAssassin, aby použil tyto tři programy. Upravte /etc/spamassassin/local.cf a přidejte do něj následující řádky:
vi /etc/spamassassin/local.cf
[...] #dcc use_dcc 1 dcc_path /usr/local/bin/dccproc #pyzor use_pyzor 1 pyzor_path /usr/bin/pyzor #razor use_razor2 1 razor_config /etc/razor/razor-agent.conf #bayes use_bayes 1 use_bayes_rules 1 bayes_auto_learn 1 |
Poté musíme povolit plugin DCC ve SpamAssassin. Otevřete /etc/spamassassin/v310.pre a odkomentujte loadplugin Mail::SpamAssassin::Plugin::DCC řádek:
vi /etc/spamassassin/v310.pre
[...] # DCC - perform DCC message checks. # # DCC is disabled here because it is not open source. See the DCC # license for more details. # loadplugin Mail::SpamAssassin::Plugin::DCC [...] |
Svou konfiguraci SpamAssassinu můžete zkontrolovat spuštěním:
spamassassin --lint
Nemělo by to vykazovat žádné chyby.
Poté restartujte amavisd-new:
/etc/init.d/amavis restart
Nyní aktualizujeme naše sady pravidel SpamAssassin takto:
sa-update --no-gpg
Vytváříme úlohu cron, aby se sady pravidel pravidelně aktualizovaly. Spustit
crontab -e
otevřete editor úloh cron. Vytvořte následující úlohu cron:
23 4 */2 * * /usr/bin/sa-update --no-gpg &> /dev/null |
Tím se aktualizují sady pravidel každý druhý den ve 4:23.
11 oznámení o překročení kvóty
Pokud chcete dostávat upozornění o všech e-mailových účtech, které překročily kvótu, vytvořte soubor /usr/local/sbin/quota_notify:
cd /usr/local/sbin/
vi kvóta_notify
#!/usr/bin/perl -w

# Author <[email protected]>
#
# This script assumes that virtual_mailbox_base in defined
# in postfix's main.cf file. This directory is assumed to contain
# directories which themselves contain your virtual user's maildirs.
# For example:
#
# -----------/
#            |
#            |
#    home/vmail/domains/
#        |          |
#        |          |
#  example.com/  foo.com/
#                   |
#                   |
#           -----------------
#           |       |       |
#           |       |       |
#         user1/   user2/  user3/
#                           |
#                           |
#                        maildirsize
#

use strict;

my $POSTFIX_CF = "/etc/postfix/main.cf";
my $MAILPROG = "/usr/sbin/sendmail -t";
my $WARNPERCENT = 80;
my @POSTMASTERS = ('[email protected]');
my $CONAME = 'My Company';
my $COADDR = '[email protected]';
my $SUADDR = '[email protected]';
my $MAIL_REPORT = 1;
my $MAIL_WARNING = 1;

#get virtual mailbox base from postfix config
open(PCF, "< $POSTFIX_CF") or die $!;
my $mboxBase;
while (<PCF>) {
   next unless /virtual_mailbox_base\s*=\s*(.*)\s*/;
   $mboxBase = $1;
}
close(PCF);

#assume one level of subdirectories for domain names
my @domains;
opendir(DIR, $mboxBase) or die $!;
while (defined(my $name = readdir(DIR))) {
   next if $name =~ /^\.\.?$/;        #skip '.' and '..'
   next unless (-d "$mboxBase/$name");
   push(@domains, $name);
}
closedir(DIR);
#iterate through domains for username/maildirsize files
my @users;
chdir($mboxBase);
foreach my $domain (@domains) {
        opendir(DIR, $domain) or die $!;
        while (defined(my $name = readdir(DIR))) {
           next if $name =~ /^\.\.?$/;        #skip '.' and '..'
           next unless (-d "$domain/$name");
      push(@users, {"$name\@$domain" => "$mboxBase/$domain/$name"});
        }
}
closedir(DIR);

#get user quotas and percent used
my (%lusers, $report);
foreach my $href (@users) {
   foreach my $user (keys %$href) {
      my $quotafile = "$href->{$user}/maildirsize";
      next unless (-f $quotafile);
      open(QF, "< $quotafile") or die $!;
      my ($firstln, $quota, $used);
      while (<QF>) {
         my $line = $_;
              if (! $firstln) {
                 $firstln = 1;
                 die "Error: corrupt quotafile $quotafile"
                    unless ($line =~ /^(\d+)S/);
                 $quota = $1;
            last if (! $quota);
            next;
         }
         die "Error: corrupt quotafile $quotafile"
            unless ($line =~ /\s*(-?\d+)/);
         $used += $1;
      }
      close(QF);
      next if (! $used);
      my $percent = int($used / $quota * 100);
      $lusers{$user} = $percent unless not $percent;
   }
}

#send a report to the postmasters
if ($MAIL_REPORT) {
   open(MAIL, "| $MAILPROG");
   select(MAIL);
   map {print "To: $_\n"} @POSTMASTERS;
   print "From: $COADDR\n";
   print "Subject: Daily Quota Report.\n";
   print "DAILY QUOTA REPORT:\n\n";
   print "----------------------------------------------\n";
   print "| % USAGE |            ACCOUNT NAME          |\n";
   print "----------------------------------------------\n";
   foreach my $luser ( sort { $lusers{$b} <=> $lusers{$a} } keys %lusers ) {
      printf("|   %3d   | %32s |\n", $lusers{$luser}, $luser);
      print "---------------------------------------------\n";
   }
        print "\n--\n";
        print "$CONAME\n";
        close(MAIL);
}

#email a warning to people over quota
if ($MAIL_WARNING) {
        foreach my $luser (keys (%lusers)) {
           next unless $lusers{$luser} >= $WARNPERCENT;       # skip those under quota
           open(MAIL, "| $MAILPROG");
           select(MAIL);
           print "To: $luser\n";
      map {print "BCC: $_\n"} @POSTMASTERS;
           print "From: $SUADDR\n";
           print "Subject: WARNING: Your mailbox is $lusers{$luser}% full.\n";
           print "Reply-to: $SUADDR\n";
           print "Your mailbox: $luser is $lusers{$luser}% full.\n\n";
           print "Once your e-mail box has exceeded your monthly storage quota\n";
      print "your monthly billing will be automatically adjusted.\n";
      print "Please consider deleting e-mail and emptying your trash folder to clear some space.\n\n";
           print "Contact <$SUADDR> for further assistance.\n\n";
           print "Thank You.\n\n";
           print "--\n";
           print "$CONAME\n";
           close(MAIL);
        }
} |
Ujistěte se, že jste upravili proměnné nahoře (zejména e-mailovou adresu [chráněný e-mailem]).
Musíme soubor nastavit jako spustitelný:
chmod 755 quota_notify
Spustit
crontab -e
pro vytvoření úlohy cron pro tento skript:
0 0 * * * /usr/local/sbin/quota_notify &> /dev/null |
12 Test Postfix
Chcete-li zjistit, zda je Postfix připraven na SMTP-AUTH a TLS, spusťte
telnet localhost 25
Po navázání připojení k vašemu poštovnímu serveru Postfix typu
ehlo localhost
Pokud vidíte čáry
250-STARTTLS
a
250-AUTH PLAIN LOGIN
vše je v pořádku:
[email protected]:/usr/local/sbin# telnet localhost 25
Zkouším 127.0.0.1...
Připojeno k localhost.localdomain.
Escape znak je '^]'.
220 server1.example.com ESMTP Postfix (Ubuntu)
<-- ehlo localhost
250-server1.example.com
250-PIPELINING
250-VELIKOST 10240000
250-VRFY
250-ETRN
250-STARTTLS
250-AUTH PLAIN LOGIN
250-AUTH=PLAIN LOGIN
250-ENHANCEDSTATUSCODES
250 -8BITMIME
250 DSN
<-- quit
221 2.0.0 Nashledanou
Spojení uzavřeno zahraničním hostitelem.
[e-mail chráněný]:/usr/local/sbin #
Typ
quit
pro návrat do systémového prostředí.
13 Naplnění databáze a test
K naplnění databáze můžete použít shell MySQL:
mysql -u root -p
USE mail;
Alespoň musíte vytvořit záznamy v tabulkách domény a uživatelé :
INSERT INTO `domains` (`doména`) VALUES ('example.com');
INSERT INTO `users` (`e-mail`, `heslo`, `kvóta`) VALUES ('[e-mail chráněný]', ENCRYPT('tajné'), 10485760);
(Dbejte prosím na to, abyste použili syntaxi ENCRYPT ve druhém příkazu INSERT za účelem zašifrování hesla!)
Pokud chcete provést záznamy v dalších dvou tabulkách, vypadalo by to takto:
INSERT INTO `forwarding` (`source`, `destination`) VALUES ('[email protected]', '[email protected]');
INSERT INTO `transport` (`doména`, `transport`) VALUES ('example.com', 'smtp:mail.example.com');
Chcete-li opustit prostředí MySQL, napište
quit;
Pro většinu lidí je jednodušší, když mají grafický front-end k MySQL; proto můžete také použít phpMyAdmin (v tomto příkladu pod http://192.168.0.100/phpmyadmin/ nebo http://server1.example.com/phpmyadmin/) pro správu mailu databáze. Znovu, když vytváříte uživatele, ujistěte se, že k zašifrování hesla používáte funkci ENCRYPT:
Nemyslím si, že musím dále vysvětlovat tabulku domén a uživatelů.
Tabulka přesměrování může obsahovat následující položky:
| zdroj | cíl | |
| [e-mail chráněn] | [e-mail chráněn] | Přesměruje e-maily pro [email protected] na [email protected] |
| @example.com | [e-mail chráněn] | Vytvoří účet Catch-All pro [chráněno e-mailem] Všechny e-maily na example.com dorazí na adresu [chráněno e-mailem], kromě těch, které existují v tabulce uživatelů (tj. pokud [chráněno e-mailem] v v tabulce uživatelů, e-maily na [e-mail chráněno] budou stále docházet na [e-mail chráněný]). |
| @example.com | @jinadomena.tld | Toto přesměruje všechny e-maily na example.com na stejného uživatele v otherdomain.tld. Např. e-maily na adresu thoma[email protected] budou přeposlány na adresu [email protected] |
| [e-mail chráněn] | [e-mail chráněn], [e-mail chráněn] | Přeposílejte e-maily pro [e-mail chráněný] na dvě nebo více e-mailových adres. Všechny uvedené e-mailové adresy v cíli obdrží kopii e-mailu. |
Transportní tabulka může mít položky jako tyto:
| doména | doprava | |
| example.com | : | Doručuje e-maily pro example.com lokálně. Jako by tento záznam v této tabulce vůbec neexistoval. |
| example.com | smtp:mail.jinadomena.tld | Doručuje všechny e-maily pro example.com přes smtp na server mail.anotherdomain.com. |
| example.com | smtp:mail.anotherdomain.tld:2025 | Doručuje všechny e-maily pro example.com přes smtp na server mail.anotherdomain.com, ale na portu 2025, nikoli 25, což je výchozí port pro smtp. |
| example.com |
smtp:[1.2.3.4] | Hranaté závorky brání Postfixu ve vyhledávání MX DNS záznamu pro adresu v hranatých závorkách. Má smysl pro IP adresy. |
| .example.com | smtp:mail.jinadomena.tld | Pošta pro libovolnou subdoménu example.com je doručována na mail.anotherdomain.tld. |
| * | smtp:mail.jinadomena.tld | Všechny e-maily jsou doručovány na mail.anotherdomain.tld. |
| [e-mail chráněn] | smtp:mail.anotherdomain.tld | Emails for [email protected] are delivered to mail.anotherdomain.tld. |
See
man transport
for more details.
Please keep in mind that the order of entries in the transport table is important! The entries will be followed from the top to the bottom.
Important: Postfix uses a caching mechanism for the transports, therefore it might take a while until you changes in the transport table take effect. If you want them to take effect immediately, run
postfix reload
after you have made your changes in the transport table.
14 Send A Welcome Email For Creating Maildir
When you create a new email account and try to fetch emails from it (with POP3/IMAP) you will probably get error messages saying that the Maildir doesn't exist. The Maildir is created automatically when the first email arrives for the new account. Therefore it's a good idea to send a welcome email to a new account.
First, we install the mailx package:
apt-get install mailutils
To send a welcome email to [email protected], we do this:
mailx [email protected]
You will be prompted for the subject. Type in the subject (e.g. Welcome), then press ENTER, and in the next line type your message. When the message is finished, press ENTER again so that you are in a new line, then press CTRL+D; if you don't want to cc the mail, press ENTER again:
[email protected]:/usr/local/sbin# mailx [email protected]
Cc:<-- ENTER
Subject:Welcome <-- ENTER
Welcome! Have fun with your new mail account. <-- ENTER
<-- CTRL+D
[email protected]:/usr/local/sbin#
15 Installing SquirrelMail
SquirrelMail is a webmail interface that will let your users send and receive emails in a browser. This chapter shows how to install it and adjust it to our setup so that users can even change their email account password from the SquirrelMail interface.
To install SquirrelMail, we run:
apt-get install squirrelmail squirrelmail-compatibility php-pear php-db
Next we symlink the Apache configuration that comes with the SquirrelMail package to the /etc/apache2/conf.d directory and restart Apache:
ln -s /etc/squirrelmail/apache.conf /etc/apache2/conf.d/squirrelmail.conf
/etc/init.d/apache2 restart
SquirrelMail comes with some pre-installed plugins, unfortunately none of them is capable of letting us change our email password in our MySQL database. But there's the Change SQL Password plugin which we can install manually:
cd /usr/share/squirrelmail/plugins
wget http://www.squirrelmail.org/plugins/change_sqlpass-3.3-1.2.tar.gz
tar xvfz change_sqlpass-3.3-1.2.tar.gz
cd change_sqlpass
cp config.php.sample config.php
Now we must edit config.php and adjust it to our setup. Please adjust the $csp_dsn, $lookup_password_query, $password_update_queries, $password_encryption, $csp_salt_static, and $csp_delimiter variables as follows and comment out $csp_salt_query:
vi config.php
[...]
$csp_dsn = 'mysql://mail_admin:[email protected]/mail';
[...]
$lookup_password_query = 'SELECT count(*) FROM users WHERE email = "%1" AND password = %4';
[...]
$password_update_queries = array('UPDATE users SET password = %4 WHERE email = "%1"');
[...]
$password_encryption = 'MYSQLENCRYPT';
[...]
$csp_salt_static = 'LEFT(password, 2)';
[...]
//$csp_salt_query = 'SELECT salt FROM users WHERE username = "%1"';
[...]
$csp_delimiter = '@';
[...] |
The complete file looks as follows:
<?php

/**
  * SquirrelMail Change SQL Password Plugin
  * Copyright (C) 2001-2002 Tyler Akins
  *               2002 Thijs Kinkhorst <[email protected]>
  *               2002-2005 Paul Lesneiwski <[email protected]>
  * This program is licensed under GPL. See COPYING for details
  *
  * @package plugins
  * @subpackage Change SQL Password
  *
  */


   // Global Variables, don't touch these unless you want to break the plugin
   //
   global $csp_dsn, $password_update_queries, $lookup_password_query,
          $force_change_password_check_query, $password_encryption,
          $csp_salt_query, $csp_salt_static, $csp_secure_port,
          $csp_non_standard_http_port, $csp_delimiter, $csp_debug,
          $min_password_length, $max_password_length, $include_digit_in_password,
          $include_uppercase_letter_in_password, $include_lowercase_letter_in_password,
          $include_nonalphanumeric_in_password;


   // csp_dsn
   //
   // Theoretically, any SQL database supported by Pear should be supported
   // here.  The DSN (data source name) must contain the information needed
   // to connect to your database backend. A MySQL example is included below.
   // For more details about DSN syntax and list of supported database types,
   // please see:
   //   http://pear.php.net/manual/en/package.database.db.intro-dsn.php
   //
   //$csp_dsn = 'mysql://user:[email protected]/email_users';
   $csp_dsn = 'mysql://mail_admin:[email protected]/mail';


   // lookup_password_query
   //
   // This plugin will always verify the user's old password
   // against their login password, but an extra check can also
   // be done against the database for more security if you
   // desire.  If you do not need the extra password check,
   // make sure this setting is empty.
   //
   // This is a query that returns a positive value if a user
   // and password pair are found in the database.
   //
   // This query should return one value (one row, one column), the
   // value being ideally a one or a zero, simply indicating that
   // the user/password pair does in fact exist in the database.
   //
   //   %1 in this query will be replaced with the full username
   //      (including domain), such as "[email protected]"
   //   %2 in this query will be replaced with the username (without
   //      any domain portion), such as "jose"
   //   %3 in this query will be replaced with the domain name,
   //      such as "example.com"
   //   %4 in this query will be replaced with the current (old)
   //      password in whatever encryption format is needed per other
   //      plugin configuration settings (Note that the syntax of
   //      the password will be provided depending on your encryption
   //      choices, so you NEVER need to provide quotes around this
   //      value in the query here.)
   //   %5 in this query will be replaced with the current (old)
   //      password in unencrypted plain text.  If you do not use any
   //      password encryption, %4 and %5 will be the same values,
   //      except %4 will have double quotes around it and %5 will not.
   //
   //$lookup_password_query = '';
   // TERRIBLE SECURITY: $lookup_password_query = 'SELECT count(*) FROM users WHERE username = "%1" AND plain_password = "%5"';
   //$lookup_password_query = 'SELECT count(*) FROM users WHERE username = "%1" AND crypt_password = %4';
   $lookup_password_query = 'SELECT count(*) FROM users WHERE email = "%1" AND password = %4';


   // password_update_queries
   //
   // An array of SQL queries that will all be executed
   // whenever a password change attempt is made.
   //
   // Any number of queries may be included here.
   // The queries will be executed in the order given here.
   //
   //   %1 in all queries will be replaced with the full username
   //      (including domain), such as "[email protected]"
   //   %2 in all queries will be replaced with the username (without
   //      any domain portion), such as "jose"
   //   %3 in all queries will be replaced with the domain name,
   //      such as "example.com"
   //   %4 in all queries will be replaced with the new password
   //      in whatever encryption format is needed per other
   //      plugin configuration settings (Note that the syntax of
   //      the password will be provided depending on your
   //      encryption choices, so you NEVER need to provide quotes
   //      around this value in the queries here.)
   //   %5 in all queries will be replaced with the new password
   //      in unencrypted plain text - BEWARE!  If you do not use
   //      any password encryption, %4 and %5 will be the same
   //      values, except %4 will have double quotes around it
   //      and %5 will not.
   //
//   $password_update_queries = array(
//            'UPDATE users SET crypt_password = %4 WHERE username = "%1"',
//            'UPDATE user_flags SET force_change_pwd = 0 WHERE username = "%1"',
//            'UPDATE users SET crypt_password = %4, force_change_pwd = 0 WHERE username = "%1"',
//                                   );
   $password_update_queries = array('UPDATE users SET password = %4 WHERE email = "%1"');


   // force_change_password_check_query
   //
   // A query that checks for a flag that indicates if a user
   // should be forced to change their password.  This query
   // should return one value (one row, one column) which is
   // zero if the user does NOT need to change their password,
   // or one if the user should be forced to change it now.
   //
   // This setting should be an empty string if you do not wish
   // to enable this functionality.
   //
   //   %1 in this query will be replaced with the full username
   //      (including domain), such as "[email protected]"
   //   %2 in this query will be replaced with the username (without
   //      any domain portion), such as "jose"
   //   %3 in this query will be replaced with the domain name,
   //      such as "example.com"
   //
   //$force_change_password_check_query = 'SELECT IF(force_change_pwd = "yes", 1, 0) FROM users WHERE username = "%1"';
   //$force_change_password_check_query = 'SELECT force_change_pwd FROM users WHERE username = "%1"';
   $force_change_password_check_query = '';


   // password_encryption
   //
   // What encryption method do you use to store passwords
   // in your database?  Please use one of the following,
   // exactly as you see it:
   //
   //   NONE          Passwords are stored as plain text only
   //   MYSQLPWD      Passwords are stored using the MySQL password() function
   //   MYSQLENCRYPT  Passwords are stored using the MySQL encrypt() function
   //   PHPCRYPT      Passwords are stored using the PHP crypt() function
   //   MD5CRYPT      Passwords are stored using encrypted MD5 algorithm
   //   MD5           Passwords are stored as MD5 hash
   //
   //$password_encryption = 'MYSQLPWD';
   $password_encryption = 'MYSQLENCRYPT';


   // csp_salt_query
   // csp_salt_static
   //
   // Encryption types that need a salt need to know where to get
   // that salt.  If you have a constant, known salt value, you
   // should define it in $csp_salt_static.  Otherwise, leave that
   // value empty and define a value for the $csp_salt_query.
   //
   // Leave both values empty if you do not need (or use) salts
   // to encrypt your passwords.
   //
   // The query should return one value (one row, one column) which
   // is the salt value for the current user's password.  This
   // query is ignored if $csp_salt_static is anything but empty.
   //
   //   %1 in this query will be replaced with the full username
   //      (including domain), such as "[email protected]"
   //   %2 in this query will be replaced with the username (without
   //      any domain portion), such as "jose"
   //   %3 in this query will be replaced with the domain name,
   //      such as "example.com"
   //
   //$csp_salt_static = 'LEFT(crypt_password, 2)';
   //$csp_salt_static = '"a4"';  // use this format with MYSQLENCRYPT
   //$csp_salt_static = '$2$blowsomefish$';  // use this format with PHPCRYPT
   //$csp_salt_static = '';
   $csp_salt_static = 'LEFT(password, 2)';

   //$csp_salt_query = 'SELECT SUBSTRING_INDEX(crypt_password, '$', 1) FROM users WHERE username = "%1"';
   //$csp_salt_query = 'SELECT SUBSTRING(crypt_password, (LENGTH(SUBSTRING_INDEX(crypt_password, '$', 2)) + 2)) FROM users WHERE username = "%1"';
   //$csp_salt_query = 'SELECT salt FROM users WHERE username = "%1"';
   //$csp_salt_query = '';


   // csp_secure_port
   //
   // You may ensure that SSL encryption is used during password
   // change by setting this to the port that your HTTPS is served
   // on (443 is typical).  Set to zero if you do not wish to force
   // an HTTPS connection when users are changing their passwords.
   //
   // You may override this value for certain domains, users, or
   // service levels through the Virtual Host Login (vlogin) plugin
   // by setting a value(s) for $vlogin_csp_secure_port in the vlogin
   // configuration.
   //
   $csp_secure_port = 0;
   //$csp_secure_port = 443;


   // csp_non_standard_http_port
   //
   // If you serve standard HTTP web requests on a non-standard
   // port (anything other than port 80), you should specify that
   // port number here.  Set to zero otherwise.
   //
   // You may override this value for certain domains, users, or
   // service levels through the Virtual Host Login (vlogin) plugin
   // by setting a value(s) for $vlogin_csp_non_standard_http_port
   // in the vlogin configuration.
   //
   //$csp_non_standard_http_port = 8080;
   $csp_non_standard_http_port = 0;


   // min_password_length
   // max_password_length
   // include_digit_in_password
   // include_uppercase_letter_in_password
   // include_lowercase_letter_in_password
   // include_nonalphanumeric_in_password
   //
   // You can set the minimum and maximum password lengths that
   // you accept or leave those settings as zero to indicate that
   // no limit should be applied.
   //
   // Turn on any of the other settings here to check that the
   // new password contains at least one digit, upper case letter,
   // lower case letter and/or one non-alphanumeric character.
   //
   $min_password_length = 6;
   $max_password_length = 0;
   $include_digit_in_password = 0;
   $include_uppercase_letter_in_password = 0;
   $include_lowercase_letter_in_password = 0;
   $include_nonalphanumeric_in_password = 0;


   // csp_delimiter
   //
   // if your system has usernames with something other than
   // an "@" sign separating the user and domain portion,
   // specify that character here
   //
   //$csp_delimiter = '|';
   $csp_delimiter = '@';


   // debug mode
   //
   $csp_debug = 0;


?> |
Now we must go into the SquirrelMail configuration and tell SquirrelMail that we use Courier as our POP3 and IMAP server and enable the Change SQL Password and the Compatibility plugins:
/usr/sbin/squirrelmail-configure
You'll see the following menu. Navigate through it as indicated:
SquirrelMail Configuration : Read: config.php (1.4.0)
---------------------------------------------------------
Main Menu --
1. Organization Preferences
2. Server Settings
3. Folder Defaults
4. General Options
5. Themes
6. Address Books
7. Message of the Day (MOTD)
8. Plugins
9. Database
10. Languages
D. Set pre-defined settings for specific IMAP servers
C Turn color on
S Save data
Q Quit
Command >> <-- D
SquirrelMail Configuration : Read: config.php
---------------------------------------------------------
While we have been building SquirrelMail, we have discovered some
preferences that work better with some servers that don't work so
well with others. If you select your IMAP server, this option will
set some pre-defined settings for that server.
Please note that you will still need to go through and make sure
everything is correct. This does not change everything. There are
only a few settings that this will change.
Please select your IMAP server:
bincimap = Binc IMAP server
courier = Courier IMAP server
cyrus = Cyrus IMAP server
dovecot = Dovecot Secure IMAP server
exchange = Microsoft Exchange IMAP server
hmailserver = hMailServer
macosx = Mac OS X Mailserver
mercury32 = Mercury/32
uw = University of Washington's IMAP server
gmail = IMAP access to Google mail (Gmail) accounts
quit = Do not change anything
Command >> <-- courier
imap_server_type = courier
default_folder_prefix = INBOX.
trash_folder = Trash
sent_folder = Sent
draft_folder = Drafts
show_prefix_option = false
default_sub_of_inbox = false
show_contain_subfolders_option = false
optional_delimiter = .
delete_folder = true
Press enter to continue... <-- press ENTER
SquirrelMail Configuration : Read: config.php (1.4.0)
---------------------------------------------------------
Main Menu --
1. Organization Preferences
2. Server Settings
3. Folder Defaults
4. General Options
5. Themes
6. Address Books
7. Message of the Day (MOTD)
8. Plugins
9. Database
10. Languages
D. Set pre-defined settings for specific IMAP servers
C Turn color on
S Save data
Q Quit
Command >> <-- 8
SquirrelMail Configuration : Read: config.php (1.4.0)
---------------------------------------------------------
Plugins
Installed Plugins
1. view_as_html
Available Plugins:
2. administrator
3. bug_report
4. calendar
5. change_sqlpass
6. compatibility
7. delete_move_next
8. demo
9. filters
10. fortune
11. info
12. listcommands
13. mail_fetch
14. message_details
15. newmail
16. sent_subfolders
17. spamcop
18. squirrelspell
19. test
20. translate
R Return to Main Menu
C Turn color on
S Save data
Q Quit
Command >> <-- 6 (or whatever number the compatibility plugin has - it's needed by the change_sqlpass plugin)
SquirrelMail Configuration : Read: config.php (1.4.0)
---------------------------------------------------------
Plugins
Installed Plugins
1. view_as_html
2. compatibility
Available Plugins:
3. administrator
4. bug_report
5. calendar
6. change_sqlpass
7. delete_move_next
8. demo
9. filters
10. fortune
11. info
12. listcommands
13. mail_fetch
14. message_details
15. newmail
16. sent_subfolders
17. spamcop
18. squirrelspell
19. test
20. translate
R Return to Main Menu
C Turn color on
S Save data
Q Quit
Command >> <-- 6 (the number of the change_sqlpass plugin)
SquirrelMail Configuration : Read: config.php (1.4.0)
---------------------------------------------------------
Plugins
Installed Plugins
1. view_as_html
2. compatibility
3. change_sqlpass
Available Plugins:
4. administrator
5. bug_report
6. calendar
7. delete_move_next
8. demo
9. filters
10. fortune
11. info
12. listcommands
13. mail_fetch
14. message_details
15. newmail
16. sent_subfolders
17. spamcop
18. squirrelspell
19. test
20. translate
R Return to Main Menu
C Turn color on
S Save data
Q Quit
Command >> <-- S
SquirrelMail Configuration : Read: config.php (1.4.0)
---------------------------------------------------------
Plugins
Installed Plugins
1. view_as_html
2. compatibility
3. change_sqlpass
Available Plugins:
4. administrator
5. bug_report
6. calendar
7. delete_move_next
8. demo
9. filters
10. fortune
11. info
12. listcommands
13. mail_fetch
14. message_details
15. newmail
16. sent_subfolders
17. spamcop
18. squirrelspell
19. test
20. translate
R Return to Main Menu
C Turn color on
S Save data
Q Quit
Command >> S
Data saved in config.php
Press enter to continue... <-- press ENTER
SquirrelMail Configuration : Read: config.php (1.4.0)
---------------------------------------------------------
Plugins
Installed Plugins
1. view_as_html
2. compatibility
3. change_sqlpass
Available Plugins:
4. administrator
5. bug_report
6. calendar
7. delete_move_next
8. demo
9. filters
10. fortune
11. info
12. listcommands
13. mail_fetch
14. message_details
15. newmail
16. sent_subfolders
17. spamcop
18. squirrelspell
19. test
20. translate
R Return to Main Menu
C Turn color on
S Save data
Q Quit
Command >> <-- Q
Now you can type in http://server1.example.com/squirrelmail or http://192.168.0.100/squirrelmail in your browser to access SquirrelMail.
Log in with your email address (e.g. [email protected]) and your password:
You should find the welcome email in your inbox:
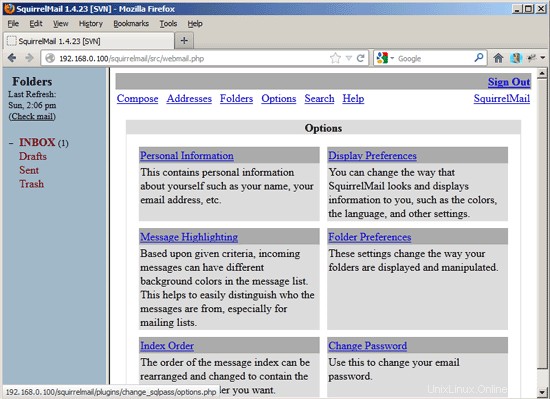
To change your password, go to Options and then select Change Password:
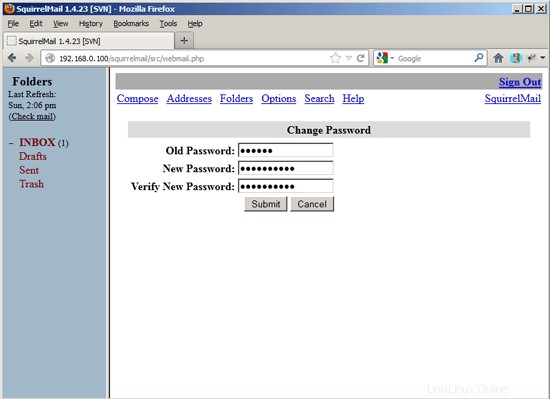
Type in your current password and then your new password twice:
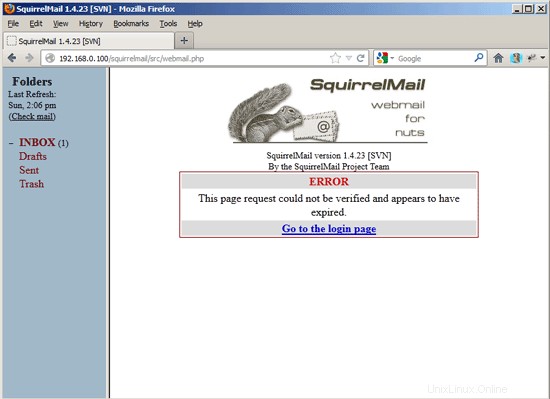
If the password has been changed successfully, you will see the following error message which means you must log in again with your new password (because the old one isn't active anymore):
16 VMA (Virtual Mail Admin Interface)
Virtual Mail Admin (VMA) is a small PHP-based web app written to manage the email system set up in this guide. I didn't test it, but I thought I'd share.
This is what the developer (Charl Loubser) wrote to me in an email:
"Hi There,
I don't know if you'll like this, or if this has any use to you, but I thought I'd Share:
I wrote a silly little webapp for the setup you did in the Howto:https://www.howtoforge.com/virtual-users-domains-postfix-courier-mysql-squirrelmail-ubuntu-10.04
If you approve and think it worthy of sharing on your tutorial, you are more than welcome, and can feel free to do so.
As mentioned in the readme, this is not a perfect app, but it does the job for now, and I'd thing it's relatively safe in a closed environment (LAN setup between servers).
The rar file with the app is attached, but can also be downloaded at :http://code.google.com/p/vma/"
17 References
- Tutorial:ISP-style Email Service with Debian-Sarge and Postfix 2.1:http://workaround.org/articles/ispmail-sarge/
- Postfix + Quota:http://vhcs.net/new/modules/newbb/viewtopic.php?topic_id=3496&forum=17
- Mail Passwords Encrypted using saslauthd:http://www.syscp.de/docs/public/contrib/cryptedmailpws
18 Links
- Postfix MTA:http://www.postfix.org/
- Postfix Quota Patch:http://web.onda.com.br/nadal/
- phpMyAdmin:http://www.phpmyadmin.net/
- SquirrelMail:http://www.squirrelmail.org/
- Ubuntu:http://www.ubuntu.com/
- Virtual Mail Admin Interface (VMA):http://code.google.com/p/vma/