Jellyfin je systém pro streamování médií s otevřeným zdrojovým kódem, který vám umožňuje spravovat a streamovat vaše média. Je to multiplatformní a alternativní k jiným aplikacím, jako je Emby a Plex. Pomocí Jellyfin můžete organizovat a sdílet své mediální soubory, televizní pořady, hudbu a fotografie z webového rozhraní. K těmto streamovaným médiím můžete přistupovat na svém PC, tabletu, telefonu, Roku a TV přes internet. Jellyfin automaticky načítá metadata z databáze TheMovieDB, OpenMovie, Rotten Tomatoes a TheTVDB.
V tomto příspěvku vám ukážeme, jak nainstalovat server pro streamování médií Jellyfin s Nginx jako reverzní proxy na Debian 10.
Předpoklady
- Server se systémem Debian 10.
- Platný název domény s adresou IP vašeho serveru.
- Na serveru je nakonfigurováno heslo uživatele root.
Začínáme
Nejprve budete muset aktualizovat své systémové balíčky na nejnovější verzi. Můžete je aktualizovat pomocí následujícího příkazu:
apt-get update -y
Jakmile jsou všechny balíčky aktualizovány, nainstalujte další požadované balíčky pomocí následujícího příkazu:
apt-get install apt-transport-https ca-certificates gnupg2 curl git -y
Jakmile jsou všechny balíčky nainstalovány, můžete přejít k dalšímu kroku.
Instalovat Jellyfin
Ve výchozím nastavení není balíček Jellyfin součástí úložiště Debian 10. Takže budete muset přidat úložiště Jellyfin do vašeho APT.
Můžete jej přidat pomocí následujícího příkazu:
echo "deb [arch=$( dpkg --print-architecture )] https://repo.jellyfin.org/debian buster main" | tee /etc/apt/sources.list.d/jellyfin.list
Jakmile je úložiště přidáno, přidejte klíč GPG pomocí následujícího příkazu:
wget -O - https://repo.jellyfin.org/jellyfin_team.gpg.key | apt-key add -
Dále aktualizujte úložiště a nainstalujte Jellyfin pomocí následujícího příkazu:
apt-get update -y
apt-get install jellyfin -y
Jakmile je Jellyfin nainstalován, můžete zkontrolovat stav Jellyfin pomocí následujícího příkazu:
systemctl status jellyfin
Měli byste získat následující výstup:
? jellyfin.service - Jellyfin Media Server
   Loaded: loaded (/lib/systemd/system/jellyfin.service; enabled; vendor preset: enabled)
  Drop-In: /etc/systemd/system/jellyfin.service.d
           ??jellyfin.service.conf
   Active: active (running) since Mon 2021-03-22 08:27:42 UTC; 5min ago
 Main PID: 10192 (jellyfin)
    Tasks: 17 (limit: 4701)
   Memory: 113.9M
   CGroup: /system.slice/jellyfin.service
           ??10192 /usr/bin/jellyfin --webdir=/usr/share/jellyfin/web --restartpath=/usr/lib/jellyfin/restart.sh --ffmpeg=/usr/lib/jellyfin-ffm

Mar 22 08:27:45 debian10 jellyfin[10192]: [08:27:45] [WRN] 127.0.0.1/32: GetBindInterface: Loopback 127.0.0.1 returned.
Mar 22 08:27:45 debian10 jellyfin[10192]: [08:27:45] [INF] Executed all pre-startup entry points in 0:00:00.1545678
Mar 22 08:27:45 debian10 jellyfin[10192]: [08:27:45] [INF] Core startup complete
Mar 22 08:27:46 debian10 jellyfin[10192]: [08:27:46] [INF] Executed all post-startup entry points in 0:00:00.1976994
Mar 22 08:27:46 debian10 jellyfin[10192]: [08:27:46] [INF] Startup complete 0:00:03.6985068
Mar 22 08:27:48 debian10 jellyfin[10192]: [08:27:48] [INF] StartupTrigger fired for task: Update Plugins
Mar 22 08:27:48 debian10 jellyfin[10192]: [08:27:48] [INF] Queuing task PluginUpdateTask
Mar 22 08:27:48 debian10 jellyfin[10192]: [08:27:48] [INF] Executing Update Plugins
Mar 22 08:27:49 debian10 jellyfin[10192]: [08:27:49] [INF] Update Plugins Completed after 0 minute(s) and 0 seconds
Mar 22 08:27:49 debian10 jellyfin[10192]: [08:27:49] [INF] ExecuteQueuedTasks
V tomto okamžiku je Jellyfin spuštěn a naslouchá na portu 8096. Můžete to zkontrolovat pomocí následujícího příkazu:
ss -antpl | grep 8096
Výstup:
LISTEN 0 128 0.0.0.0:8096 0.0.0.0:* users:(("jellyfin",pid=10192,fd=289))
Konfigurovat Nginx jako reverzní proxy
Dále budete muset nakonfigurovat Nginx jako reverzní proxy pro přístup k Jellyfin na portu 80.
Nejprve nainstalujte balíček Nginx pomocí následujícího příkazu:
apt-get install nginx -y
Po instalaci vytvořte nový konfigurační soubor Nginx pomocí následujícího příkazu:
nano /etc/nginx/conf.d/jellyfin.conf
Přidejte následující řádky:
server {
      listen 80;
      server_name jellyfin.example.com;

      access_log /var/log/nginx/jellyfin.access;
      error_log /var/log/nginx/jellyfin.error;

      set $jellyfin 127.0.0.1;

      location / {
          proxy_pass http://127.0.0.1:8096;
          proxy_set_header Host $host;
          proxy_set_header X-Real-IP $remote_addr;

          proxy_set_header X-Forwarded-For $proxy_add_x_forwarded_for;
          proxy_set_header X-Forwarded-Proto $scheme;
          proxy_set_header X-Forwarded-Protocol $scheme;
          proxy_set_header X-Forwarded-Host $http_host;

          # Disable buffering when the nginx proxy gets very resource heavy upon streaming
          proxy_buffering off;
      }

      # location block for /web - This is purely for aesthetics so /web/#!/ works instead of having to go to /web/index.html/#!/
      location ~ ^/web/$ {
          # Proxy main Jellyfin traffic
          proxy_pass http://$jellyfin:8096/web/index.html/;
          proxy_set_header Host $host;
          proxy_set_header X-Real-IP $remote_addr;
          proxy_set_header X-Forwarded-For $proxy_add_x_forwarded_for;
          proxy_set_header X-Forwarded-Proto $scheme;
          proxy_set_header X-Forwarded-Protocol $scheme;
          proxy_set_header X-Forwarded-Host $http_host;
      }

      location /socket {
          # Proxy Jellyfin Websockets traffic
          proxy_pass http://$127.0.0.1:8096;
          proxy_http_version 1.1;
          proxy_set_header Upgrade $http_upgrade;
          proxy_set_header Connection "upgrade";
          proxy_set_header Host $host;
          proxy_set_header X-Real-IP $remote_addr;
          proxy_set_header X-Forwarded-For $proxy_add_x_forwarded_for;
          proxy_set_header X-Forwarded-Proto $scheme;
          proxy_set_header X-Forwarded-Protocol $scheme;
          proxy_set_header X-Forwarded-Host $http_host;
      }

        # Security / XSS Mitigation Headers
        add_header X-Frame-Options "SAMEORIGIN";
        add_header X-XSS-Protection "1; mode=block";
        add_header X-Content-Type-Options "nosniff";
}
Uložte a zavřete soubor a poté pomocí následujícího příkazu ověřte, zda Nginx neobsahuje nějakou chybu syntaxe:
nginx -t
Výstup:
nginx: the configuration file /etc/nginx/nginx.conf syntax is ok
nginx: configuration file /etc/nginx/nginx.conf test is successful
Poté restartujte službu Nginx, aby se změny aplikovaly:
systemctl reload nginx
Přístup k Jellyfin
Nyní otevřete webový prohlížeč a přejděte na webové rozhraní Jellyfin pomocí adresy URL http://jellyfin.example.com . Budete přesměrováni na následující stránku:

Vyberte jazyk a klikněte na Další knoflík. Měli byste vidět následující stránku:
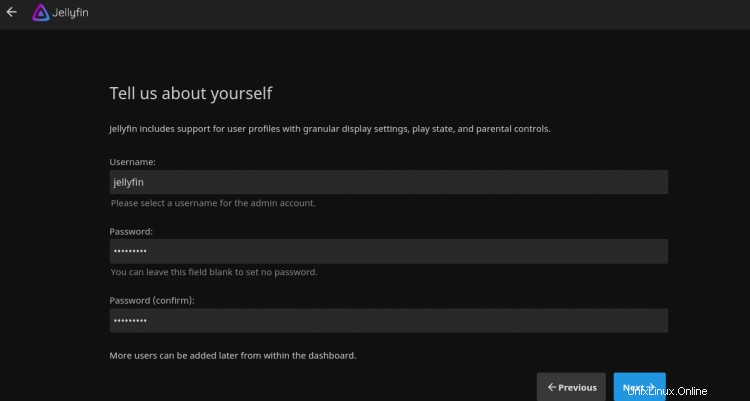
Zadejte své uživatelské jméno, heslo a klikněte na Další knoflík. Měli byste vidět následující stránku:

Klikněte na Další knoflík. Měli byste vidět následující stránku:

Vyberte jazyk metadat a klikněte na Další knoflík. Měli byste vidět následující stránku:

Povolte vzdálený přístup a klikněte na Další knoflík. Po dokončení instalace byste měli vidět následující stránku:
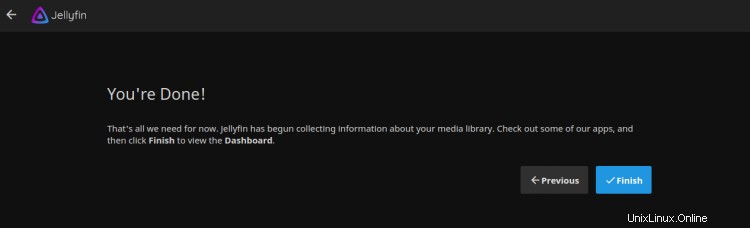
Klikněte na Dokončit tlačítko pro dokončení instalace. Měli byste vidět přihlašovací stránku Jellyfin:
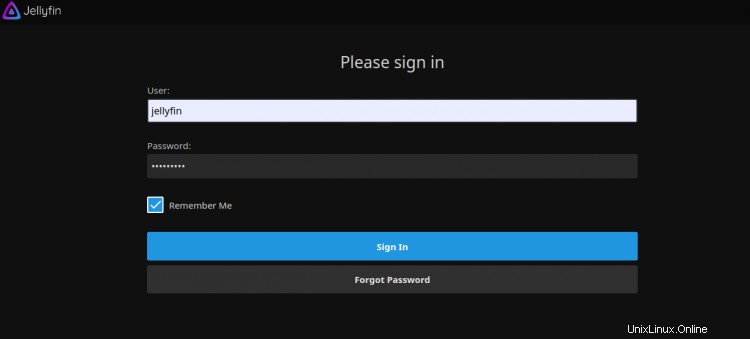
Zadejte své uživatelské jméno, heslo a klikněte na Podepsat V knoflík. Na následující stránce byste měli vidět řídicí panel Jellyfin:

Zabezpečte Jellyfin pomocí Let's Encrypt SSL
Dále budete muset nainstalovat klientský balíček Certbot pro instalaci správy Let's Encrypt SSL. Nejprve nainstalujte Certbot pomocí následujícího příkazu:
apt-get install python3-certbot-nginx -y
Po dokončení instalace spusťte následující příkaz a nainstalujte Let's Encrypt SSL na svůj web:
certbot --nginx -d jellyfin.example.com
Budete požádáni, abyste poskytli platnou e-mailovou adresu a přijali podmínky služby, jak je uvedeno níže:
Saving debug log to /var/log/letsencrypt/letsencrypt.log
Plugins selected: Authenticator nginx, Installer nginx
Enter email address (used for urgent renewal and security notices) (Enter 'c' to
cancel): [email protected]

- - - - - - - - - - - - - - - - - - - - - - - - - - - - - - - - - - - - - - - -
Please read the Terms of Service at
https://letsencrypt.org/documents/LE-SA-v1.2-November-15-2017.pdf. You must
agree in order to register with the ACME server at
https://acme-v02.api.letsencrypt.org/directory
- - - - - - - - - - - - - - - - - - - - - - - - - - - - - - - - - - - - - - - -
(A)gree/(C)ancel: A

- - - - - - - - - - - - - - - - - - - - - - - - - - - - - - - - - - - - - - - -
Would you be willing to share your email address with the Electronic Frontier
Foundation, a founding partner of the Let's Encrypt project and the non-profit
organization that develops Certbot? We'd like to send you email about our work
encrypting the web, EFF news, campaigns, and ways to support digital freedom.
- - - - - - - - - - - - - - - - - - - - - - - - - - - - - - - - - - - - - - - -
(Y)es/(N)o: Y
Obtaining a new certificate
Performing the following challenges:
http-01 challenge for jellyfin.example.com
Waiting for verification...
Cleaning up challenges
Deploying Certificate to VirtualHost /etc/nginx/conf.d/jellyfin.conf
Dále zvolte, zda chcete přesměrovat provoz HTTP na HTTPS, jak je uvedeno níže:
- - - - - - - - - - - - - - - - - - - - - - - - - - - - - - - - - - - - - - - -
1: No redirect - Make no further changes to the webserver configuration.
2: Redirect - Make all requests redirect to secure HTTPS access. Choose this for
new sites, or if you're confident your site works on HTTPS. You can undo this
change by editing your web server's configuration.
- - - - - - - - - - - - - - - - - - - - - - - - - - - - - - - - - - - - - - - -
Select the appropriate number [1-2] then [enter] (press 'c' to cancel): 2
Zadejte 2 a stiskněte Enter pro dokončení instalace. Měli byste vidět následující výstup:
Redirecting all traffic on port 80 to ssl in /etc/nginx/conf.d/jellyfin.conf

- - - - - - - - - - - - - - - - - - - - - - - - - - - - - - - - - - - - - - - -
Congratulations! You have successfully enabled https://jellyfin.example.com

You should test your configuration at:
https://www.ssllabs.com/ssltest/analyze.html?d=jellyfin.example.com
- - - - - - - - - - - - - - - - - - - - - - - - - - - - - - - - - - - - - - - -

IMPORTANT NOTES:
 - Congratulations! Your certificate and chain have been saved at:
   /etc/letsencrypt/live/jellyfin.example.com/fullchain.pem
   Your key file has been saved at:
   /etc/letsencrypt/live/jellyfin.example.com/privkey.pem
   Your cert will expire on 2020-10-30. To obtain a new or tweaked
   version of this certificate in the future, simply run certbot again
   with the "certonly" option. To non-interactively renew *all* of
   your certificates, run "certbot renew"
 - Your account credentials have been saved in your Certbot
   configuration directory at /etc/letsencrypt. You should make a
   secure backup of this folder now. This configuration directory will
   also contain certificates and private keys obtained by Certbot so
   making regular backups of this folder is ideal.
 - If you like Certbot, please consider supporting our work by:

   Donating to ISRG / Let's Encrypt:   https://letsencrypt.org/donate
   Donating to EFF:                    https://eff.org/donate-le

 - We were unable to subscribe you the EFF mailing list because your
   e-mail address appears to be invalid. You can try again later by
   visiting https://act.eff.org.
Nyní je váš web zabezpečený pomocí Let's Encrypt SSL. Můžete k němu bezpečně přistupovat pomocí adresy URL https://jellyfin.example.com.
Závěr
Gratulujeme! úspěšně jste nainstalovali Jellyfin na server Debian 10. Nyní můžete snadno sdílet svá média se svými přáteli, rodinou a dalšími uživateli.