
V tomto tutoriálu vám ukážeme, jak nainstalovat Ntopng na Ubuntu 14.04. Pro ty z vás, kteří to nevěděli, je Ntopng poměrně užitečným nástrojem, pokud chcete monitorovat jinou síť protokoly na vašich serverech. Poskytuje spoustu nástrojů pro sledování různých protokolů, variant provozu a ano, šířky pásma v různých časových rámcích. Ntopng je založen na libpcap a byl napsán přenosným způsobem, aby mohl virtuálně běžet na každém Unixu platformě, macOS a také na Win32.
Tento článek předpokládá, že máte alespoň základní znalosti Linuxu, víte, jak používat shell, a co je nejdůležitější, hostujete své stránky na vlastním VPS. Instalace je poměrně jednoduchá. ukáže vám krok za krokem instalaci Ntopng na Ubuntu 14.04.
Nainstalujte Ntopng na Ubuntu 14.04
Krok 1. Nejprve přidejte Ntopng repo do našeho seznamu repo.
sudo nano /etc/apt/sources.list.d/ntop.list
Pak přidejte tento řádek:
deb http://www.nmon.net/apt-stable/12.04/ x64/
deb http://www.nmon.net/apt-stable/12.04/ all/
Přidejte klíč a poté spusťte aktualizaci:
wget -qO - http://www.nmon.net/apt-stable/ntop.key | sudo apt-key add -
sudo apt-get update
Krok 2. Nainstalujte Ntopng a závislosti.
sudo apt-get install libpcap-dev libglib2.0-dev libgeoip-dev redis-server libxml2-dev libnl1
sudo apt-get install ntopng pfring nprobe ntopng-data n2disk nbox
Krok 3. Nakonfigurujte Ntopng.
Vytvořte konfigurační soubor Ntopng. V tomto článku používáme nano jako textový editor. K vytvoření konfiguračních souborů Ntopng můžete použít svůj oblíbený textový editor:
sudo nano /etc/ntopng/ntopng.conf
# /etc/ntopng/ntopng.conf
#
#        The  configuration  file is similar to the command line, with the exception that an equal
#        sign '=' must be used between key and value. Example:  -i=p1p2  or  --interface=p1p2  For
#        options with no value (e.g. -v) the equal is also necessary. Example: "-v=" must be used.
#
#
#       -G|--pid-path
#        Specifies the path where the PID (process ID) is saved.
#
-G=/var/tmp/ntopng.pid
#
#       -e|--daemon
#        This  parameter  causes ntop to become a daemon, i.e. a task which runs in the background
#        without connection to a specific terminal. To use ntop other than as a casual  monitoring
#        tool, you probably will want to use this option.
#
-e=
#
#       -i|--interface
#        Specifies  the  network  interface or collector endpoint to be used by ntopng for network
#        monitoring. On Unix you can specify both the interface name  (e.g.  lo)  or  the  numeric
#        interface id as shown by ntopng -h. On Windows you must use the interface number instead.
#        Note that you can specify -i multiple times in order to instruct ntopng to create  multi‐
#        ple interfaces.
#
-i=1
#
#       -w|--http-port
#        Sets the HTTP port of the embedded web server.
#
-w=3000
#
#       -m|--local-networks
#        ntopng determines the ip addresses and netmasks for each active interface. Any traffic on
#        those  networks  is considered local. This parameter allows the user to define additional
#        networks and subnetworks whose traffic is also considered local in  ntopng  reports.  All
#        other hosts are considered remote. If not specified the default is set to 192.168.1.0/24.
#
#        Commas  separate  multiple  network  values.  Both netmask and CIDR notation may be used,
#        even mixed together, for instance "131.114.21.0/24,10.0.0.0/255.0.0.0".
#
-m=192.168.1.0/24
#
#       -n|--dns-mode
#        Sets the DNS address resolution mode: 0 - Decode DNS responses  and  resolve  only  local
#        (-m)  numeric  IPs  1  -  Decode DNS responses and resolve all numeric IPs 2 - Decode DNS
#        responses and don't resolve numeric IPs 3 - Don't decode DNS responses and don't  resolve
#
-n=1
#
#       -S|--sticky-hosts
#        ntopng  periodically purges idle hosts. With this option you can modify this behaviour by
#        telling ntopng not to purge the hosts specified by -S. This parameter requires  an  argu‐
#        ment  that  can  be  "all"  (Keep  all hosts in memory), "local" (Keep only local hosts),
#        "remote" (Keep only remote hosts), "none" (Flush hosts when idle).
#
-S=
#
#       -d|--data-dir
#        Specifies the data directory (it must be writable). Default directory is ./data
#
-d=/var/tmp/ntopng
#
#       -q|--disable-autologout
#        Disable web interface logout for inactivity.
#
-q=
Vytvořte soubor ntopng.start:
sudo nano /etc/ntopng/ntopng.start

##Add this line##

--local-networks "192.168.0.0/24"  ## give your local IP Ranges here.
--interface 1
Chcete-li zobrazit všechna dostupná rozhraní a možnosti, použijte ntopng -h možnost:
sudo ntopng -h
Krok 4. Spusťte démona serveru Ntopng a Redis.
sudo service redis-server start
sudo service ntopng start
Krok 5. Otestujte Ntopng.
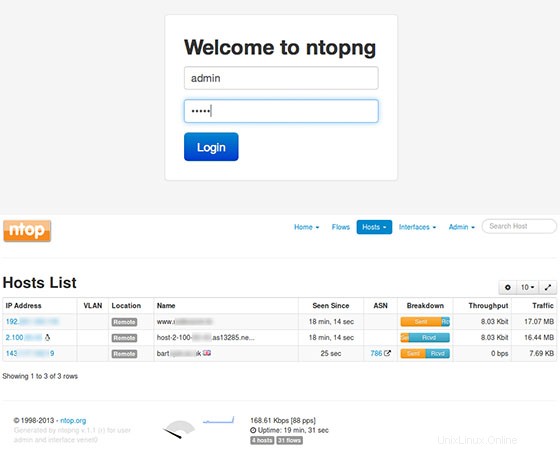
Nyní můžete otestovat svou aplikaci Ntopng zadáním http://název_vašeho_serveru:3000. Zobrazí se rozhraní přihlašovací stránky Ntopng. Poprvé můžete použít uživatele 'admin' a heslo 'admin'.
Blahopřejeme! Úspěšně jste nainstalovali Ntopng. Děkujeme, že jste použili tento návod k instalaci monitorování serveru Ntopng na systémech Ubuntu 14.04. Pro další pomoc nebo užitečné informace vám doporučujeme navštívit oficiální web Ntopng.